Sunday, March 27, 2011

PROJECT: Fabric Crochet Bracelets


Here is a fun quick accessory to make and all you need to know how to do is a basic single crochet stitch. I cut strips of fabric about an inch wide for this project and used a large crochet hook (I think mine was size P but any huge one you use for big hook crochet will do). I tried using several different fabrics but a few frayed a lot so they didn't work as well. I let the strips fray a little and the bracelets have somewhat of a "shabby chic" look which I like. I ended up with 4 of each gray, turquoise and navy.


To make these bracelets cast on 15 stitches (I made some with just 13 or 14 stitches cast on for smaller wrists). Then join the round and do one round of single crochet stitches. After that cut fabric, weave in ends and enjoy your new bracelet!


Let me know in a comment below if you like this project or plan on trying it yourself! Thanks for reading and make sure to check back in a few days because next I will post a special Creations by Bonnybee crafting challenge,

*Bonnybee

Monday, March 21, 2011

PROJECT: Button Earrings and GIVEAWAY!!

Here is a fun project which is super easy to do and the possibilities are endless! I am going to show you how to make button earrings. You can use any size or type of buttons but they have to have a flat back or be able to be made flat. As you will see, I liked several buttons that did not have a flat back so I enlisted my awesome boyfriend who has mad skills with his dremel tool to take the backs off my buttons.

All you need for this project is some buttons (with a flat back), post earring components (available in the jewelry section of you local craft store; make sure to also buy earring backs if they don't come with them) and some strong glue or epoxy.

Once you gather all you materials you will be able to make these!


After you gather some pretty buttons, if they are not the flat back kind, you must make them flat by removing the back pieces. My boyfriend did this with a dremel tool with a grinder attachment.


Here he is hard at work with Wrigley of course supervising.


These are what the buttons started out as.


And here is one set after the back has been grinded off.


The next and final step is to glue some earring posts to the buttons. This is very easy, just get a good glue (I use E600 as shown below which works great. It is available at Wal-Mart or craft stores but just make sure to read the label and use in a well ventilated area) and stick your earring backs in the center of the button. Or if the button is really long, you might have to adjust the placement of the back to make it sit good on your ear. Make sure to get a thick even coat of glue on the post pad and get a good secure connection.


Here are some of my finished products.


GIVEAWAY!!!! For my loyal readers I am going to give away two pairs of these button earrings. You can choose from these 5 pairs and the first two readers to comment on this post below with which ones they would like will get that pair! Make sure to leave your email so I can contact you for a shipping address.


Giveaway earrings to choose from (from left to right): pink elephants, red lips, illustrated sail boats, ladybugs or dark blue sail boats

Thanks for stopping by! Make sure to leave a comment and grab a pair of these earrings,

*Bonnybee

Friday, March 18, 2011

PROJECT: Snooki Shades

Warning: If you are going to judge me negatively for having a post relating in any way to the TV program "The Jersey Shore" please navigate away from this page

I do not claim to be a fan of the show The Jersey Shore. In fact I use to speak up adamantly in opposition to the program, claiming it was the shame of our youth's culture and encouraged meaningless and disgusting lifestyles. That was until I was persuaded to watch the show... I will admit it has its entertainment value. This leads us to today's post. I was recently invited to a Jersey Shore themed costumed party and I would never pass up a chance for a good costume party.

We decked out guido style with fake tans, clothes and accessories to match the look.


I focused on dressing up as Snooki so I added the large hair poof, the over-sized fuzzy slippers and the bejeweled sunglasses. So below is a super easy tutorial on how to make and rock your own fabulous Snooki shades!

Materials needed are the largest pair of sunglasses you can find which you don't mind transforming (I purchased mine at Wal-Mart for $4) and some acrylic jewels, rhinestones or sequins.


Lay out and hot glue your jewels to your glasses and you are all set to fist pump in style! Extra bonus, I could actually see through my glasses since there was some space between the jewels, thus they stayed on the whole night.


Craftin' costumes isn't just for Halloween! Have you been dressing up as anything fun lately?

*Bonnybee

Tuesday, March 15, 2011

PROJECT: Fabric Coasters

Last fall my grandmother gave me a pair of little coffee tables that she wanted me to strip and refinish for her. This was my first experience stripping and restaining furniture so I was excited to try, especially for someone as special to me as my grandmother. While growing up, she encouraged my craftiness, teaching me to sew (gave me my first ever and current sewing machine) to quilt, to knit, make macrame plant hangers and encouraging any other craft I may have used to make a mess in her house. I am very grateful for her creative inspiration and constant encouragement.

I was returning her tables at Christmastime so I decided to maker her handmade Christmas gift fabric coasters to compliment her newly refinished tables. I found the tutorial for these coasters on a cutsie little blog called Flossie Teacakes. Here is shot of the finished products atop one of her refinished tables:


I will give a simple tutorial but feel free to check out the above link for a great tutorial also. First is to gather your materials. For each coaster you will need one fabric square with sides measuring 6.5" and one with sides measuring 4.5". The fabric I used is actually from a scrap bag of quilting fabrics my grandmother gave me with my first hand-me-down sewing machine. The pieces match many of the fabrics used in her quilted living room pillows! You will also need three 4.5" squares of quilt batting to give the coaster some substance. You also need your standard tools like a sewing machine, matching thread and rotary cutter or scissors.


Layer the pieces large fabric square, inside facing up, then 3 layers of batting (this will be compressed a lot by the end) then the small fabric square inside facing down. Pin in place or use spray adhesive if desired.


Then start sewing! Begin on one corner of the small square .25" from the edge. Continue the entire edge of the square and when you reach your starting point, begin a second square .25" from the last sew line. You will be making a kind of square spiral into the center.


After sewing my layers together, my fabric pieces were a little wonky but this is fine -- if this happens to you, just trim up the edges of the large square so it is even with the small square.


Next fold over the large square edges twice and pin down as shown in the picture.


Sew a hidden stitch or whip stitch along the binding you just folded over and you are finished! Repeat for as many coasters as you desire.


Here is a picture of one of the refinished tables where these little coasters now live. I simply followed refinishing directions and used a stripper from Home Depot. The whole process is not hard, but sure is messy and pretty time consuming! I think I will stick to painting furniture or only staining if the wood is raw.


Tune in later this week for another blog post about a costume I had to craft up!

*Bonnybee

Monday, March 14, 2011

Bonnybee is Back!

After far too long of an absence, I am back with tons of wonderful projects to keep you busy this spring. I apologize for my absence; after the holidays I got busy with work, a wonderful trip to Nicaragua (which I will share some about below), and remodeling the kitchen at my childhood home (which I will share about whenever it is finally finished!) Also, to reward my loyal readers for returning, I plan on doing several giveaways in the next couple of months so stay tuned!

This January I traveled to Nicaragua with the Presbyterian Hunger Program and Equal Exchange for a fair trade delegation. It was an amazing opportunity where I learned about how fair trade is affecting the lives of Nicaraguans, how we can support these efforts, and how a major fair trade product, coffee, is produced. Now I try to keep my blog strictly crafty so I am also going to share about the several co-ops we visited which support local Nicaraguan women and families.

Me picking coffee with Otto, a member of my host family

My first meeting with the coffee plant. I learned all about the coffee plant and the picking of it. Organic and Fair Trade coffee is so much better than other options because it doesn't use pesticides or picking machines which harm the plants by using chemicals and stripping the plants of young berries and stems. Not only are they better for the environment, but they are also better socially as they provide fair living wages to the farmers who work hard to deliver a quality product and support their families.

A HARD days work!


President of the Tierra Nueva Co-op (the co-op of coffee farmers in Boaco, Nicaragua who hosted our delegation) showing us the cacao plant...where chocolate comes from! Mmmm!

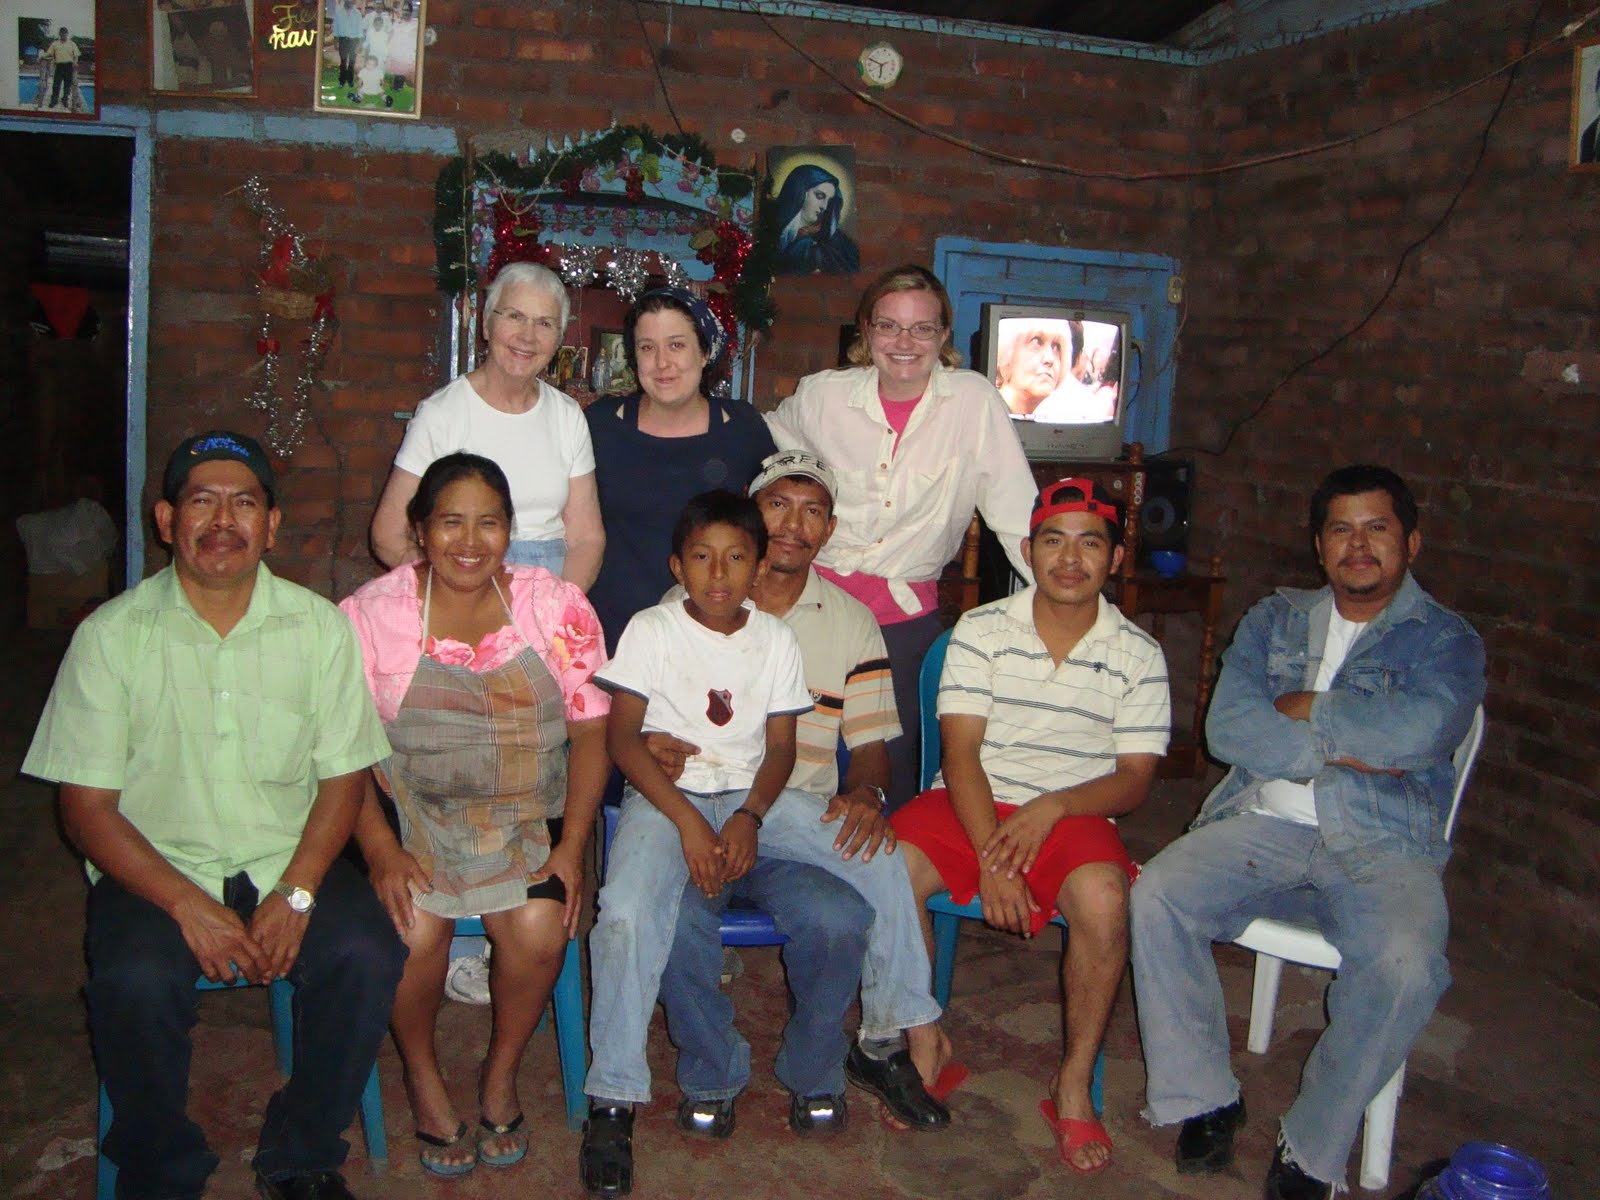
My host family with the three delegation members they housed. They were absolutely amazing, gracious and welcoming. I saw first hand how fair trade coffee farming has improved their lives and felt how important it was for me to bring news of the benefits of fair trade back to the United States.

Me posing with Tierra Nueva's coffee bags at the drying and processing plant.

Trying out my nose at coffee "cupping". It all smelled like coffee to me...


We visited several artisan co-ops but my favorite by far was the Ducuale Women's Pottery Co-operative. They make beautiful wood fired and hand painted pottery.

Me chatting with one of the artists (en Espanol!) about our common love of ceramics. To see more fair trade artisan products visit Esperanza en Accion, a Nicaraguan co-op which works to improve the lives of artisans in Nicaragua.

Going on this trip was such a blessing and I am grateful I had this opportunity. I encourage all of you crafty folks to think about the human side of the production of goods we buy. All the products we buy, whether food, clothes, art or even craft supplies are made by someone and we should be striving for a just economic system.

Check back soon for a new project! Until then go buy some fair trade coffee or learn more about fair trade at EqualExchange.com!

*Bonnybee

Friday, December 17, 2010

Handmade Gift Idea: Reusable Shopping Bags

These awesome tote bags are one of my most favorite projects to do. When reusable shopping bags became really popular, I loved the idea of creating my own personal alternative to wasteful plastic bags. I decided to make up several more to give this year as Christmas gifts so here is the pattern I came up with awhile ago.

Following this pattern, one yard of fabric can make two shopping bags. The finished size of the bags are around 16"w x 18"l. The first step is to fold the yard of fabric long ways. (If you get a yard of 44" wide fabric this will be the length of the folded or long edge).


Next cut the fabric as follows. (The bottom edge shown in this picture is the folded edge). From one side (the left in the photo), cut four 3" wide strips, then divide the remaining fabric into two 16" wide pieces. The large pieces will be the bodies of the bags and the 3" wide strips will be your straps.


First is to construct the straps. Take the strip to an ironing board and turn one long edge over 1/4" and iron.


Then turn the other raw edge into the middle of the strap and iron.


Lastly, take the first folded long edge and fold it over so it is overlapping with the other side. Iron and pin. Repeat this with both (or all 4 straps if you are doing both bags at once) straps.


Next is to sew the straps. Starting on the center fold, sew the strap three times to make sure it is good and secure.


Now it is time to work on the bag. Take your long piece of fabric over to the iron and fold over one of the short sides of the fabric and iron.


Fold over the edge again, approximately 1", and then tuck one of the straps under this fold. Make sure the underside of the strap (side with the seam) is facing down during this step. I place the outer edges of the straps 4" in from the edge of the fabric. Pin the straps and seam. Do this with the other short side and a second strap also.


Now sew along the folded edge you just made. I used a zigzag stitch but a straight stitch would work also.


Next flip up the straps and sew a strong box around the end of the strap. To sew the strong box sew around the 4 edges of where the strap overlaps the edge of the bag and sew an X between these 4 edges.


Repeat this process for both side of the bag and both of the straps. Once this is done your bag should look like the below picture -- a long piece of fabric with finished handles on the ends.


Next we will be making the bottom of the bag kind of flat (to spread out some of the grocery weight) by folding the sides once before sewing. Fold the bag in half with the wrong sides on the inside and the straps aligned with one another. Pin 1" up on both sides of the open sides of the bag.


Then holding where these pins are flip the bag wrong side out.


Below is a side shot of what the sides will look like once you have done the folding.


Now pin up the two open sides.


Sew up the open sides of the bag, sewing over your pinned folds. I sewed the seam twice then cut the raw edges with pinking shears to prevent fraying.


The bag is now finished so turn it right side out and enjoy! (Or go back and finish the other bag you already cut the pieces for!)

I made a total of 6 bags this time around. Below are my fun fabric choices and how they turned out. I am excited to give some of these away for Christmas!


So will you make some of your own reusable shopping bags? Have you made some already? If so how did you make yours and do you have any tips? I would love to hear from you in comments below.

Hope you all enjoyed this project,

*Bonnybee


I linked up this handmade gift idea to the following blogs: