
Here is Alyssa fashioning the one of the finished scarves

And here we both are wearing the scarves in a classic "friends take a photo in the bathroom mirror" photo.

Now for the tutorial!
Well you can make this scarf with whatever amount of fabric you wish, making it long and skinny or short and fat, or whatever dimensions you desire. It is all the same construction which is basically an endless tube of fabric. However I will share what dimensions of fabric we used. For our first attempt, the dark green scarf, this was a much thinner, stretchier jersey and the starting piece measured 29" wide by 77" long. For the orange and white stripe (or creamsicle fabric as we called it) it was a much thicker jersey knit and we wanted the scarf to be much longer and fuller than the first. The measurements of the starting creamsicle fabric was 34" wide by 90" long.
 Note: I find that the stretcher a fabric is, the harder it is to work with. This really stretchy jersey was harder to measure and cut and harder so sew up the edges evenly. Fortunately since you are making a big continuous tube you do not have to worry as much about your seams being exact!
 The first step is to fold the fabric long ways (hot dog style) with right sides together and sew up the long end. You will now have a long tube of fabric with open endings.

Here is creamisicle scarf in the big long tube stage
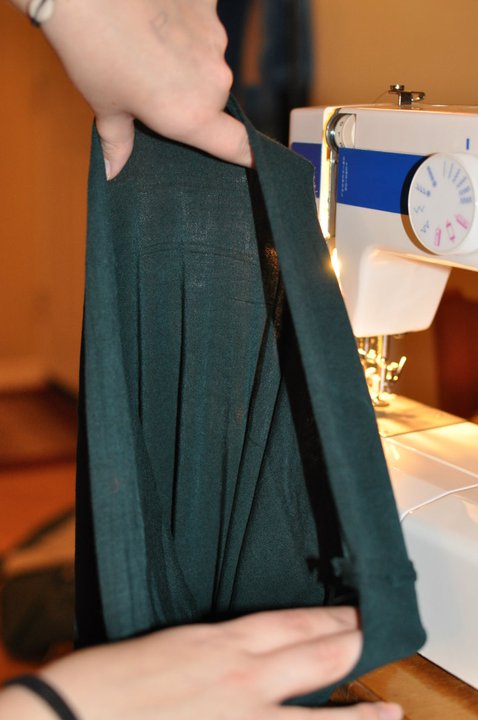
Here you can see the open ends after this step
Next turn the scarf right side out and match the two open tube ends together. Do this by lining up the seams, right sides facing. Now sew around the circumference of the tube ends. You will not be able to sew completely around, so leave the last few inches and sew these up by turning raw edges in and sewing by hand.

The above picture shows the two tube ends lined up and ready to sew.
Sorry I do not have a good photo of closing up the remaining opening, but it is very similar to closing the remaining opening on a pillowcase. And after this is complete the scarf is done!
The project is really easy and it probably takes a little longer to complete when working with a friend, but can be much more fun that way!


Here are our sewing machines, which of course are now buddies, and another photo of us enjoying our new scarves.
Click here to read Alyssa's blog entry on crafting with friends.
Will you try these scarves yourself? They would make wonderful Christmas gifts! I would also like to know, do any of you have crafting friends whom you do projects with? I would love to hear form you in comments below.
Staying warm and stylish in my new scarf,
*Bonnybee
No comments:
Post a Comment