Thursday, May 26, 2011

Headband Giveaway Winner

Congratulations to Diana who is the winner of this Black Paisley Headband!


Her comment was chosen via number from Random.org.


Thank you to everyone who entered this giveaway. For my very first giveaway I listed it on some other blogs and giveaway sites and got a very large response but this time I decided to only post it on my blog and see which readers came through. Thank you so much for reading my blog; crafting is such a part of my life and sharing such a part of my personality so this outlet is perfect for me!

I look forward to bringing you some more projects and making this blog even better.

*Bonnybee

Tuesday, May 24, 2011

PROJECT: Industrial Necklace Display


Attention: There is only one day left to enter to win the Black Paisley Headband I am giving away so go enter before reading on!


I recently made this super awesome necklace display for my Bonnybee Designs booth and have been loving it so much that I just had to share it with you all. Even if you aren't selling jewelry, you might have enough long necklaces to fill this baby up so in case you would like to make one here is the super easy way to do it.


I can not claim credit for this design as it was shared with me by another generous jewelry seller at a show I went to a few weeks ago. All it is is galvanized pipe pieces from the hardware store. To make it you will need three pieces of galvanized pipe (found in the plumbing section of your local hardware store for about $6 a piece). I used 18" pieces for all three but there are a lot of different sizes so you can vary them based on what look or size you are going for. You need two corner pieces which the poles screw into and two end pieces which the vertical poles screw into and can be secured to a piece of wood on each side to hold it up. Below is a close up of the corner pieces. The corner and end pieces are right next to the sections of pipe and are only a few dollars each.


Assemble your piece and you are all done. You could probably create any concoction of pipes to make a display for whatever you want (I remember seeing a picture somewhere of someone using these as shelves on the wall to stand books on; hmm I will have to go search for that). The more I looked at this display the more psyched I was with it. Another bonus is that it can be easily disassembled if you want to move it or change the shape. Very cool!


Above is a photo of the new display living happily on my booth. I am off to prep a new sewing project but what I am working on is a surprise...until my next post that is.

All my craft love,

*Bonnybee

Wednesday, May 18, 2011

Black Paisley Headband Giveaway!

Last night I made a batch of jeweled headbands as they have been a customer favorite at my shows this summer. I decided to reward my wonderful readers by giving away one of these awesome headbands.


For a chance at winning this headband you must be a follower of my blog and write a comment at the bottom of this entry saying what has been your favorite blog entry from Creations by Bonnybee! This giveaway will be open for 1 week and will end next Wednesday at midnight. A winner will be chosen via Random.org (so make sure to leave your email so I can contact the winner!) You may earn additional entries by sharing this post of facebook, blogging about it, or favoriting my shop on Etsy. Leave additional comments for each additional entry.


Here are photos of some of the other headbands I made. I am not going to post them in my Etsy shop right now because I have some more shows this summer, but if you are interested in any of them, like always you can contact me via facebook, Etsy, or this blog to request an order!


Let the giveaway begin!

*Bonnybee

Friday, May 13, 2011

PROJECT: Flower Hair Clips

This project is another hair accessory which is perfect to wear with your new warm weather clothes. I first decided to make these because I wanted to make some to clip onto the baby crochet headbands as a gift for my boyfriend's niece. I ended up with a whole rainbow of different colors and styles.


All you need for materials are artificial flowers, hot glue, felt, and some hair clips (all of these items can be purchased from your local craft store). Instead of learning how to making them, I decided to purchase the crochet headbands for $1 each from a recent craft show I was at, but they are available many places.


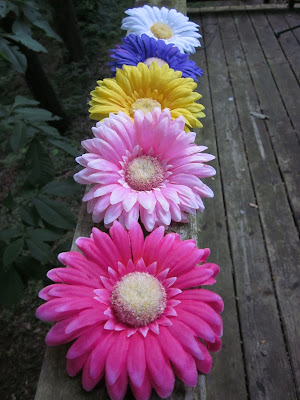
Above are all the colors my friend will receive, including 5 different headbands and 10 different flowers (I wanted her to have plenty of options, including three different choices for UT orange!)

To make the clip, I covered it in felt as shown in my previous hair clip tutorial. I also clipped off any excess stem from the back of the flower to try and make it as flat as possible.


I then glued a piece of felt to the back of the flower (this makes a sturdier surface to attach the clip to I think). Then I glued my felt covered clip to the flower back.


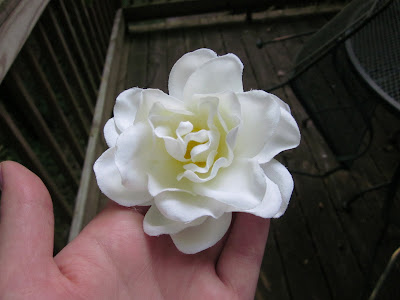
Above you can see the finished flower clip. These can be worn in the hair or clipped to the crochet headbands or beanies for babies or young girls. They are so easy and inexpensive to make, you can make one for every outfit! Here are some photos of the rest of the bunch.

(I couldn't help but show off my fun spring time lavender nails in this photo!)


Hopefully with her mother's permission I will be able to post some photos of the beautiful baby girl wearing her new headbands! For those long time blog readers, this is the same sweet baby girl who I made the pink nursery decorations for in one of my first ever blog entries.

Update: See this post for the promised photos!

Please let me know what you think of this project in comments below!

I am off to dream of future craft projects,

*Bonnybee

Craft Show Tomorrow!

Hello my lovely blog readers! If you are reading this I wholeheartedly invite you to visit the Knoxville Creative Hands Street Team Spring Show TOMORROW in downtown Knoxville! I will be there along with many terrific local artists and Etsy sellers so make sure to stop by for some fun browsing and wonderful people!


Hope to see you there,

*Bonnybee

Friday, May 6, 2011

PROJECT: Slumping Wine Bottles

This past week I have been playing in my pottery studio with melting wine bottles in my kiln. I have seen these cute repurposed wine bottles around the handmade scene and always wanted to try it. I mean how hard is it to melt glass, right? Well I was never able to find instructions on how to melt glass in a ceramic kiln (as opposed to a glass kiln) and was too scared to attempt it until last month when I had a booth next to some very friendly glass fusion artists and they told me in detail what custom firing I had to do to melt the bottles and fire them at the correct rate to make them sturdy. I bought one mold so I can melt the bottles into a shallow serving dish or all the way flat to make a cheese/cracker/whatever platter. Here are pictures of my first round of bottles.


So what do you guys think? Fun way to recycle and make a green craft in my opinion. Unfortunately not everyone has akiln but if you do have access to one and would like to know the firing schedule, just ask and I would be happy to share.

This Saturday (tomorrow) Bonnybee Designs will be in Memphis, TN at the Indie Style Market which I am very excited about! If you are in the area make sure to stop by!


Come back to see what I am up to next. Until then keep on craftin',

*Bonnybee

Sunday, May 1, 2011

PROJECT: Feather Hair Accessories and Challenge Completion!

Alright I am officially one day into May but I have completed my five April challenge projects and this post will share the remaining two. So I am counting this challenge as completed! First I will show you the feather hair accessories I made.


While in the hair accessories mode I whipped up these two cutsies from some other non-feather scraps.


In case you would like to try and make some of these here are some hints and tips that I learned while making these.

For the hair clips I used different sizes of alligator clips, but to make the surface more friendly to attach feathers, I covered them in a layer of felt. I attached the felt and feathers with hot glue but be careful because you need to use just the right amount of glue with the feathers because they are very delicate and can get messed up easily . I got my feathers from a great Etsy store, BearyBox.

Here is how I did the layered feather headbands (I forgot to take pictures of these so I will show you those later) and layered feather clips. You just start at one side and add feathers one at a time overlapping until the end of your piece.

For the other feather headbands I cut two teardrop pieces of felt and gathered a metal headband and a bunch of feathers. To make the feather pad, I layered and layered the feathers on the first piece of felt until it completely covered the felt in a pleasing way.

I also added buttons, lace or other items to the feather pads to get a look I liked. Then to attach the feather pad to the headband, lay the pad feather side down on the table.

Then hot glue the headband to the feather pad and sandwich the other piece of felt on top, making a secure hold.


Warning: This project is one of the messiest I have other done (second only to grouting mosaics) so be prepared for your table to be covered in scraps like this.


And every time you exhale or move, tiny feather pieces like this will fly all over your table and carpet!


I am really pleased how these hair accessories turned out and hope you like them too! Which are your favorites? Would you wear these or make some yourself? I do plan on selling these at shows and festivals so if you would like to snag one for yourself just let me know in an email or comment below!

Now on to my final project that will use up my April craft store purchases! Here is a multiple chain necklace I have been wanting to make using the chains I purchased.


Alright my Bonnybee Challenge is officially complete! What shall my next project be? Any requests?

*Bonnybee