
Update: The vinyl has won the battle, but I will win the war!!!
Tuesday, Cosmetic Bag #2
I have officially declared war on the vinyl I have been using for the inside of the cosmetic bags. My second bag still fought against being lined with the vinyl and I am going to consider a different plan of attack. Today I am stopping by JoAnn's to hunt for the iron on vinyl I read about. Plan B is to just leave the fabric unprotected on the inside or use some not as attractive, already durable fabric like ripstop nylon.

In the mean time, check out today's cosmetic bag. I am pleased with the cuteness of it but it is not nearly as flawless as I would like. I took some more detailed photos and am going to walk you through the process a bit because I did not use any tutorial exactly, and it is a fairly simple design.

First I gathered and cut my materials to size. I wanted a pencil/brush case so my dimensions were 8" x 4". I cut two pieces each of outer fabric, lining, interfacing and the dreaded vinyl. I also trimmed the zipper to 8".


Next I sewed my interfacing to my outer fabric and the vinyl to the fabric lining with a zigzag stitch around the edge so I could work with the two pieces as one. As you can see from the picture, the vinyl immediately caused trouble. Between it sticking to the presser foot and slipping away from the striped fabric, I could not get it sewn nicely onto the fabric. Thus these pieces are a little misshapen.

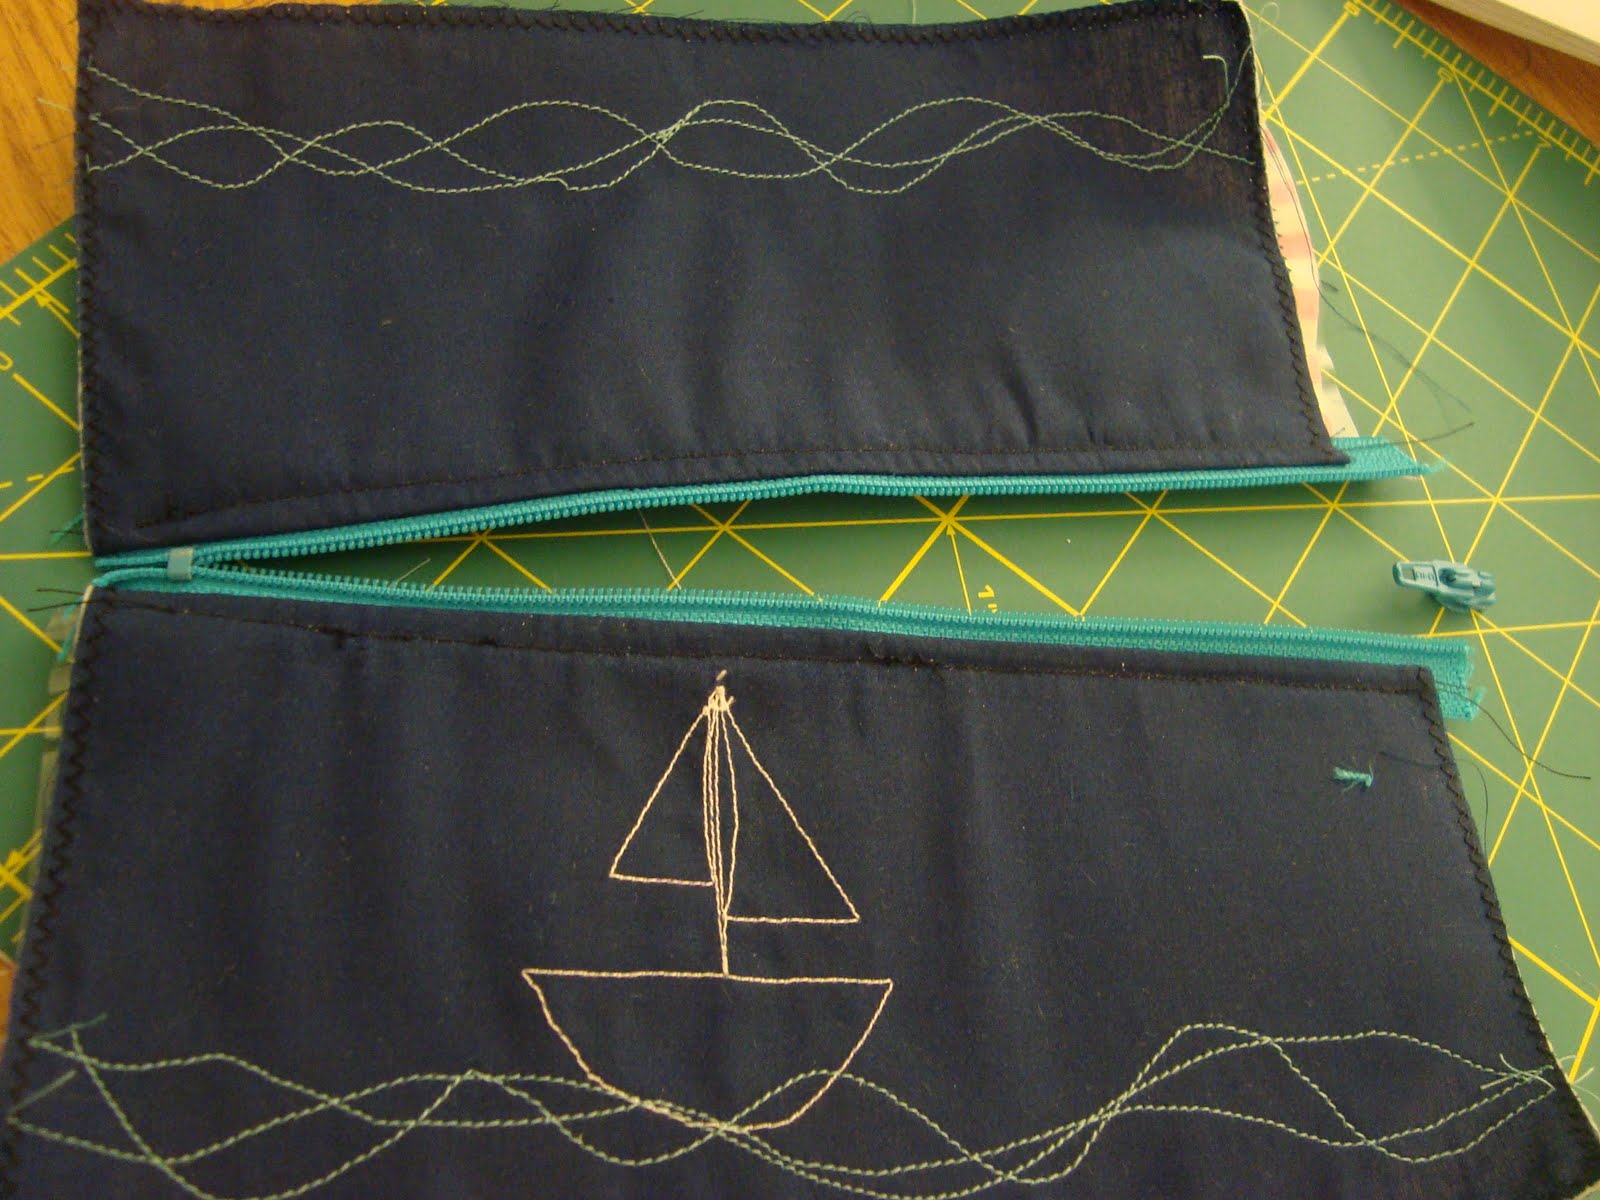
Next I added my sailboat embroidery detail. I drew my design on the back of the front piece which, because of the previous step, is now backed with interfacing.
 I used white thread for the boat and light blue for the water. This was my first time sewing a pattern onto fabric with the stitching and I think it came out well, but I am excited to practice more. One thing I failed to take into account was that the bottom, or bobbin side, of the stitching is not as attractive as the top side. I liked sewing it bottom side up so I had a pattern to follow, but think it will look better if I do it the other way next time.
 Next came attaching the zipper. This is done by sandwiching the zipper between the fabrics in the following order: Outer fabric right side facing up, zipper facing down and lining right side facing down. Line up all three pieces evenly at the top, pin and sew (using zipper foot). Next repeat this with the other side of the zipper and other fabric pieces.
 Now turn fabric wrong sides facing each other (fabric side of lining against interfacing side of outer fabric on both sides) and top stitch next to the zipper. This prevents the fabric from getting caught in the zipper later.
 As you can probably guess, the vinyl made trouble once again. As you can see from my less that straight top stitching, the vinyl kept sticking and not wanting to feed under the presser foot. I lightened the pressure on my presser foot to try and help this some, but it still did not want to play nice with my sewing machine.
Now pay attention to this next part and learn from my mistake!

If you trim your zipper to fit, make sure to be very careful when zipping and unzipping it until your sides are all sewn up. If you aren't, you might do like me and zip it right off! If this does happen it is possible, with some intense finagling, to calmly reattach it. Or you could do as I did and gasp, shout exclamations of shock, and mope at your sewing machine while your oh so sweet boyfriend reattaches it. Best if you just be careful and avoid this downfall.
Onto the next step! You are almost done!
 First unzip the zipper halfway and do not touch it again. This is very important because if you do not do this, you will not be able to turn your bag right side out later! Now turn both the outer fabric and lining so their right sides are facing each other as shown in the picture. Then stitch all the way around the edge using a 1/4" seam allowance but leave a 2 or 3" opening in the lining. Take care to push the extra zipper ends towards the lining side and watch this when you are sewing around the end of the zipper. You want to sew right next to the end of the zipper.
After doing this, turn your bag right side out through the opening you left in the lining.
 This can be a struggle, especially if you are using sticky vinyl, but keep going and I promise you will get there. After turning it right side out, straighten up your fabric and lining, push out your corners with your finger and Voila! you are finished. (If you do not have plastic on the inside of your pouch you can iron the finished product to make it neat)
Here are some pictures of the finished product serving its purpose by holding some makeup pencils and brushes.


Next I added my sailboat embroidery detail. I drew my design on the back of the front piece which, because of the previous step, is now backed with interfacing.
 I used white thread for the boat and light blue for the water. This was my first time sewing a pattern onto fabric with the stitching and I think it came out well, but I am excited to practice more. One thing I failed to take into account was that the bottom, or bobbin side, of the stitching is not as attractive as the top side. I liked sewing it bottom side up so I had a pattern to follow, but think it will look better if I do it the other way next time.
 Next came attaching the zipper. This is done by sandwiching the zipper between the fabrics in the following order: Outer fabric right side facing up, zipper facing down and lining right side facing down. Line up all three pieces evenly at the top, pin and sew (using zipper foot). Next repeat this with the other side of the zipper and other fabric pieces.
 Now turn fabric wrong sides facing each other (fabric side of lining against interfacing side of outer fabric on both sides) and top stitch next to the zipper. This prevents the fabric from getting caught in the zipper later.
 As you can probably guess, the vinyl made trouble once again. As you can see from my less that straight top stitching, the vinyl kept sticking and not wanting to feed under the presser foot. I lightened the pressure on my presser foot to try and help this some, but it still did not want to play nice with my sewing machine.
Now pay attention to this next part and learn from my mistake!
If you trim your zipper to fit, make sure to be very careful when zipping and unzipping it until your sides are all sewn up. If you aren't, you might do like me and zip it right off! If this does happen it is possible, with some intense finagling, to calmly reattach it. Or you could do as I did and gasp, shout exclamations of shock, and mope at your sewing machine while your oh so sweet boyfriend reattaches it. Best if you just be careful and avoid this downfall.
Onto the next step! You are almost done!
 First unzip the zipper halfway and do not touch it again. This is very important because if you do not do this, you will not be able to turn your bag right side out later! Now turn both the outer fabric and lining so their right sides are facing each other as shown in the picture. Then stitch all the way around the edge using a 1/4" seam allowance but leave a 2 or 3" opening in the lining. Take care to push the extra zipper ends towards the lining side and watch this when you are sewing around the end of the zipper. You want to sew right next to the end of the zipper.
After doing this, turn your bag right side out through the opening you left in the lining.
 This can be a struggle, especially if you are using sticky vinyl, but keep going and I promise you will get there. After turning it right side out, straighten up your fabric and lining, push out your corners with your finger and Voila! you are finished. (If you do not have plastic on the inside of your pouch you can iron the finished product to make it neat)
Here are some pictures of the finished product serving its purpose by holding some makeup pencils and brushes.


Here are some embroidered pencil cases from etsy for you to ogle at.
1. 2.
2.  3.
3. 
1. Case with a Circle/ Hand Embroidery from handyhandscorner
2. MIA zippered pouch - fil rouge with scissors brass charm from loddelina
3. Real leather embroidered fish pencil case from tugbakop
1.
2. 3. 1. Case with a Circle/ Hand Embroidery from handyhandscorner
2. MIA zippered pouch - fil rouge with scissors brass charm from loddelina
3. Real leather embroidered fish pencil case from tugbakop
Thanks for checking out Day #2 of my week of cosmetic bags. Please leave a comment below; I would love to hear from you! Do you have any cosmetic bag experiences? Or perhaps you know something about working with vinyl?! What shapes do you use most for storing your makeup goodies? I think tomorrow will be a small boxy bag so come back and see how it turns out!
*Bonnybee
*Bonnybee
Your cosmetic purse is so adorable, I love the cheerful colour combination of striped lining and the zipper!
ReplyDeleteI enjoyed reading your post, thank you so much for mentioning me,
I wish you happy sewing!
This is very nice of you, thank you. Handy hands' corner.
ReplyDeleteWow, thank you so much for including my embroidered fish pencil case from my Etsy! I'm very flattered! IThis tutorial is great, everything is covered step by step, great photos and even better outcome. I love the candy stripe lining! Feel free to stop by my blog at http://tugbakop.blogspot.com/, I have more embroidered goodness where that came from! Thanks again!
ReplyDeletecan i have it?
ReplyDelete