
First off I want to share that I have had success with vinyl!!!!!! I am so very excited to share this third cosmetic bag with y'all. It is a small boxy bag with a very nice shape to it. I found the tutorial for this one from Suzanne at A New Creation and she found it from Make it Modern so now with my tutorial sharing how I made it my own, you will have three places you may look for this fun little bag!

First thing I want to do is tell you about the new vinyl material I used, how it works and how well it turned out! This stuff is 100x better than just buying vinyl sheeting and trying to sew it in. It is more expensive (the package I bought was almost $10 for one roll of about 2 yds) but so worth it. It wasn't easy to find at JoAnn's but eventually I found it hidden among the rolls of sew in interfacing. Here is a picture of the brand I found.
 Iron On Vinyl by Heat'N Bond
2 - pieces exterior fabric measuring 8"x6"
2 - pieces interior fabric measuring 8"x6"
2 - pieces interfacing measuring 8"x6"(I used iron on because that is what I had in my supplies but you can use sew in if you like)
2 - pieces iron on vinyl measuring 8"x6"
1 - 12" zipper
and coordinating thread
Next I attached my vinyl to the interior fabric following the package instructions. First you peel back the paper from your vinyl piece and lay it sticky side down on the right side of your interior fabric. This will be the side that shows in the interior of your bag.


With the vinyl side up, lay the paper you just removed back over the piece. Iron (with iron on wool setting) on top of the paper for 8 seconds in each spot (directions could change if you are using a different brand of vinyl). Slowly move the iron to cover all areas for 8 seconds.


Then flip your piece over and iron on the fabric side for 4 seconds over each area.

Next slowly peal back the paper and let the piece cool. You will then have a terrific piece of vinyl lined fabric!

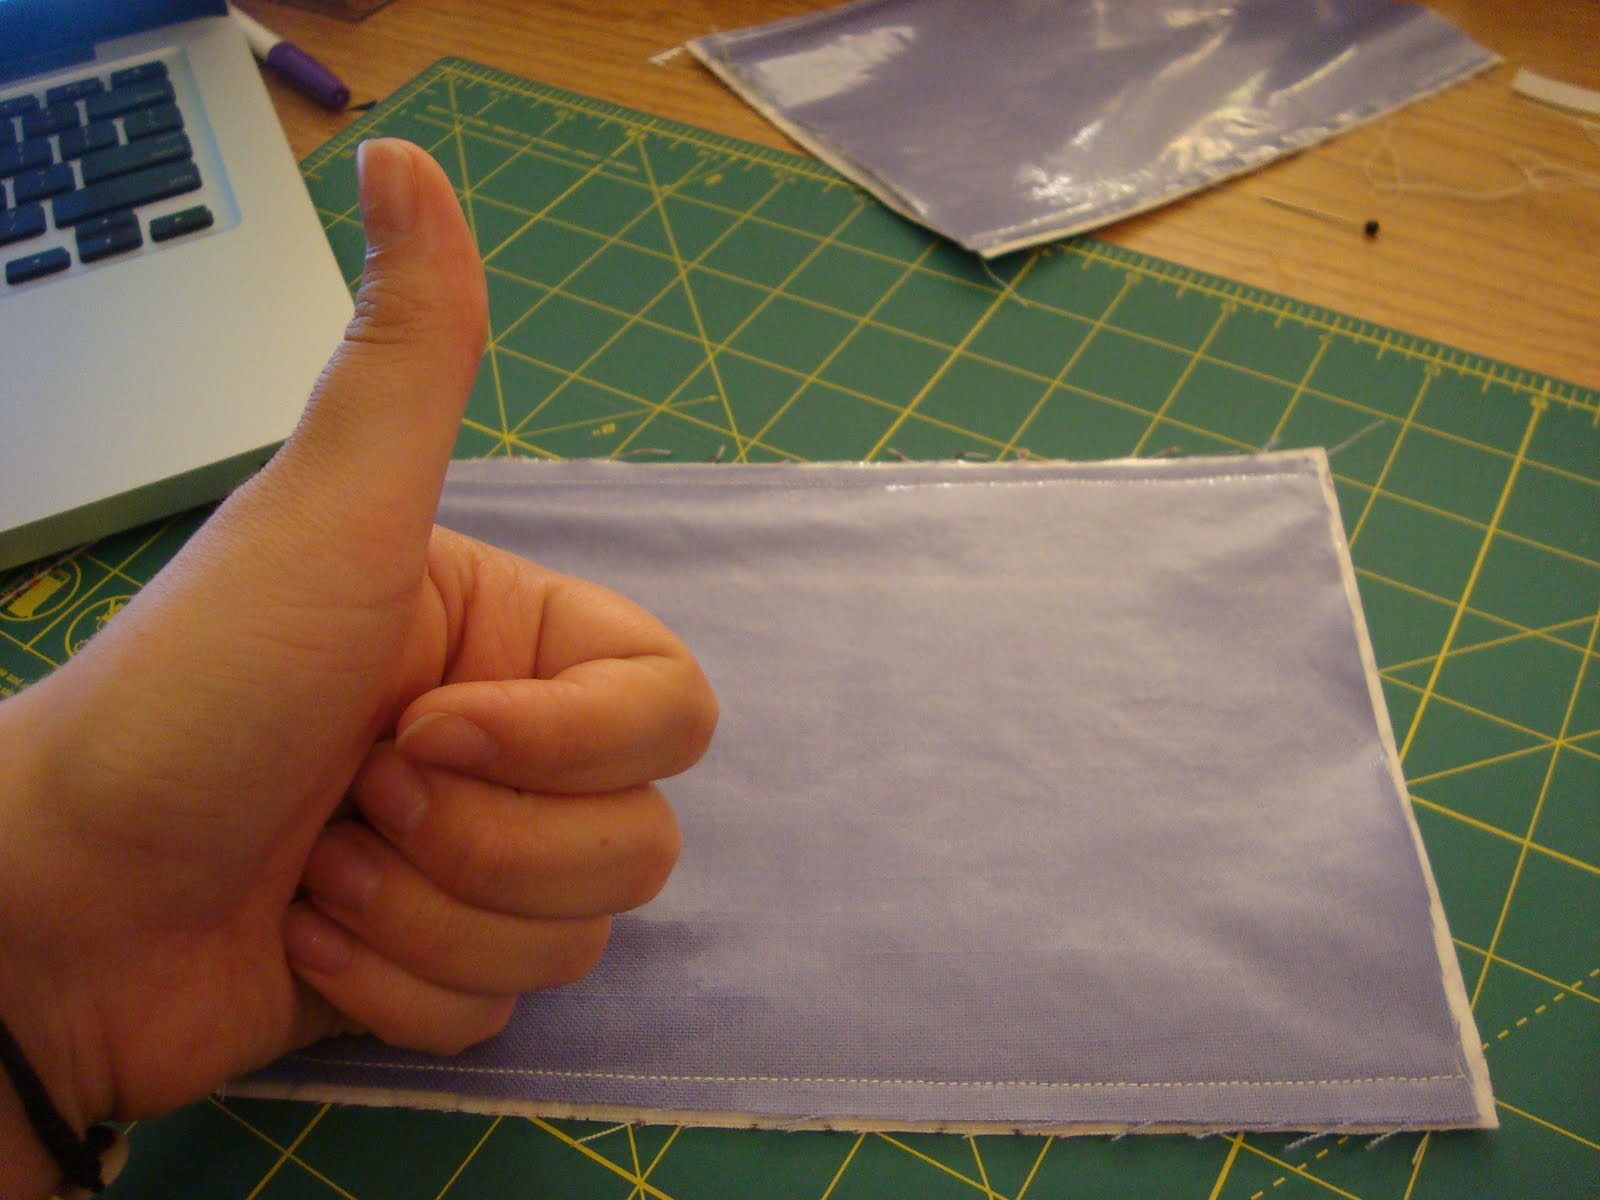
Now onto the construction of the bag. First you will combine all your layers into two identical sheets of fabric (one for each side). Lay your exterior and interior fabrics wrong sides together with the interfacing in the middle and sew along the 8" sides of the pieces. This is just to put the entire sides of the bags together to make the next steps easier. This picture shows the interior side after doing this step. The thumbs up is in reference to the excitement I felt over how well the vinyl looked after sewing!
 Next I attached the two sides to the zipper. I folded over one of the 8" sides I sewed in the last step and sewed it pretty side up to the zipper.

Here is what the fabric and zipper should look like once both sides are done.

Note that this way of attaching the zipper is different from the last two bags I have done. This way you only sew along each side of the zipper once and it is visible.

Next flip your sides right sides facing each other and sew the remaining 8" sides together. I did not take a picture of this but once this is done you will have created a tube like construction with the vinyl side on the outside. Flatten this tube so that the seam you just sewed is touching the zipper as shown in the picture below.
 Note: The other tutorials instruct you to press the bag at this point and a few other times when sewing seams. If you are using vinyl like me I would advise against this because it could melt your plastic
Next unzip your zipper halfway and sew up your short sides being careful when sewing across the zipper. Sew back over the zipper a few times to make sure it is secure. You may trim down the excess zipper at this point but leave around 1" extra or else you run the risk of you zipper end poking to the outside of the bag later.
Now you have your pouch sewn up completely inside out (except for the opening you left in the zipper). Before turning it right side out we will sew and trim the corners of the piece to transform it into a boxy shape. Turn the pouch on its side and flatten the corners into little triangles. Mark a line to sew one inch in from the point of your triangle (the triangle you want to remove has a 1" height and a 2" base and you will be sewing along the base) This sounds confusing but just check out the pictures.


2 - pieces interior fabric measuring 8"x6"
2 - pieces interfacing measuring 8"x6"(I used iron on because that is what I had in my supplies but you can use sew in if you like)
2 - pieces iron on vinyl measuring 8"x6"
1 - 12" zipper
and coordinating thread
Next I attached my vinyl to the interior fabric following the package instructions. First you peel back the paper from your vinyl piece and lay it sticky side down on the right side of your interior fabric. This will be the side that shows in the interior of your bag.


With the vinyl side up, lay the paper you just removed back over the piece. Iron (with iron on wool setting) on top of the paper for 8 seconds in each spot (directions could change if you are using a different brand of vinyl). Slowly move the iron to cover all areas for 8 seconds.


Then flip your piece over and iron on the fabric side for 4 seconds over each area.

Next slowly peal back the paper and let the piece cool. You will then have a terrific piece of vinyl lined fabric!

Now onto the construction of the bag. First you will combine all your layers into two identical sheets of fabric (one for each side). Lay your exterior and interior fabrics wrong sides together with the interfacing in the middle and sew along the 8" sides of the pieces. This is just to put the entire sides of the bags together to make the next steps easier. This picture shows the interior side after doing this step. The thumbs up is in reference to the excitement I felt over how well the vinyl looked after sewing!
 Next I attached the two sides to the zipper. I folded over one of the 8" sides I sewed in the last step and sewed it pretty side up to the zipper.
Here is what the fabric and zipper should look like once both sides are done.

Note that this way of attaching the zipper is different from the last two bags I have done. This way you only sew along each side of the zipper once and it is visible.

Next flip your sides right sides facing each other and sew the remaining 8" sides together. I did not take a picture of this but once this is done you will have created a tube like construction with the vinyl side on the outside. Flatten this tube so that the seam you just sewed is touching the zipper as shown in the picture below.
 Note: The other tutorials instruct you to press the bag at this point and a few other times when sewing seams. If you are using vinyl like me I would advise against this because it could melt your plastic
Next unzip your zipper halfway and sew up your short sides being careful when sewing across the zipper. Sew back over the zipper a few times to make sure it is secure. You may trim down the excess zipper at this point but leave around 1" extra or else you run the risk of you zipper end poking to the outside of the bag later.
Now you have your pouch sewn up completely inside out (except for the opening you left in the zipper). Before turning it right side out we will sew and trim the corners of the piece to transform it into a boxy shape. Turn the pouch on its side and flatten the corners into little triangles. Mark a line to sew one inch in from the point of your triangle (the triangle you want to remove has a 1" height and a 2" base and you will be sewing along the base) This sounds confusing but just check out the pictures.


You are now complete with all the sewing. Trim off the excess material around the corners and any other places on the interior of the bag. If you have them, use pinking shears to prevent fraying along these seams because they will be exposed on the interior of your bag.

After doing this turn your bag right side out and celebrate your beautiful creation! Here are some pictures of my final bag. I was very pleased with how the vinyl lining came out.


Here are some more cuties from Etsy. Since my pouch today was a different kind of shape I decided to share some bags with you that have great unique shapes of their own.

Here is a larger boxy shape from maryjmaalouf. I love the quilting like detail she did on the outside.

This tiny pouch from jessicalynnbabies is absolutely adorable. The button closure and unique shape make it different and I am crazy about the fabric choice.

I think the shape of this slouch clutch from MSpen is awesome and I am loving the leather suede fabric with the metal zipper. This turquoise one just sold but the link will take you to an identical yellow one.

After doing this turn your bag right side out and celebrate your beautiful creation! Here are some pictures of my final bag. I was very pleased with how the vinyl lining came out.


Here are some more cuties from Etsy. Since my pouch today was a different kind of shape I decided to share some bags with you that have great unique shapes of their own.
Here is a larger boxy shape from maryjmaalouf. I love the quilting like detail she did on the outside.
This tiny pouch from jessicalynnbabies is absolutely adorable. The button closure and unique shape make it different and I am crazy about the fabric choice.
I think the shape of this slouch clutch from MSpen is awesome and I am loving the leather suede fabric with the metal zipper. This turquoise one just sold but the link will take you to an identical yellow one.
Thanks to everyone for reading and I would love to hear from you in the comments section below. I am off to work on tomorrow's cosmetic bag so make sure to come back and see it!
*Bonnybee
way to go chick!!
ReplyDeletep.s. hope you are entering all my giveaways!!!
ReplyDeleteCosmetic bag meant for project week so you will love to have it with you while on a project
ReplyDeletecosmetic bags