Here is a photo of what the chairs looked like before the transformation.

The cushions were still in good shape so I decided to just cover them with a new fabric to hide the retro fabric that they came with. I would love to be talented at reupholstering (anyone know where I can take a class in Birmingham?) but for this project I just had to wing it.
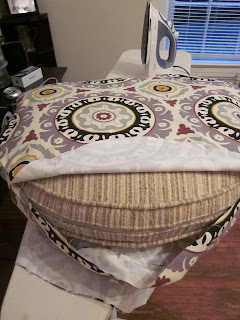
I traced around the cushion and added an inch for seam allowance to get the top and bottom pieces. I also cut a strip of fabric to be the sides of the cushion and chose the size of this by measuring how wide and long it was on the original cushion.
 I sewed the long edge of the strip around the top piece, right sides together. I sewed the other side of the strip to the bottom piece, leaving a 2 ft opening so I could turn the cover right side out and put it over the cushion.
Then I sewed the opening shut. I didn't have zippers long enough for this and knew I would never actually take these to get cleaned so instead of making them removable, I made these permanent slipcovers. They didn't turn out wonderful but I think they do they job and no one is going to look close enough to witness the imperfections.

For the chairs, I deglossed them then primed and painted them with spray paint. I used a color from Rustoleum called winter gray. I loved the color on the cap but once the chairs were finished and inside I worried they looked a little light bluish. Here is a photo of the chairs after paint, but before glaze.

The paint did a lot for these chairs but what really made them look superb was the glaze process I did next. This was my first time using glaze but I had been wanting to try this for a long time. I watched this video on glazing from one of my favorite blogs to get tips on the technique. I used Valspar tintable glaze from Lowe's that I had tinted black.

Here are a bunch of photos of the finished product, after the glazing. Pictures really do not do these justice. The glaze makes all the details pop wonderfully and they look so antique-y and beautiful. Other than the slightly bluish tint they have, I am thrilled with the results. What do you all think?


 I am off to continue ruining my nails with chemicals, paint and sanders :),
*Bonnybee

ooh i love these! thanks for sharing all of these awesome DIYs! They are so good!
ReplyDeleteUmmmm those chairs are AWESOME!!! Thank you for sharing! xoxo
ReplyDeleteThanks for the compliments! I really appreciate it.
ReplyDelete